Summary
Editor's rating
Is it good value compared to rigid panels?
Thin, bendy and easy to mount (with a few caveats)
Build quality and how tough they actually feel
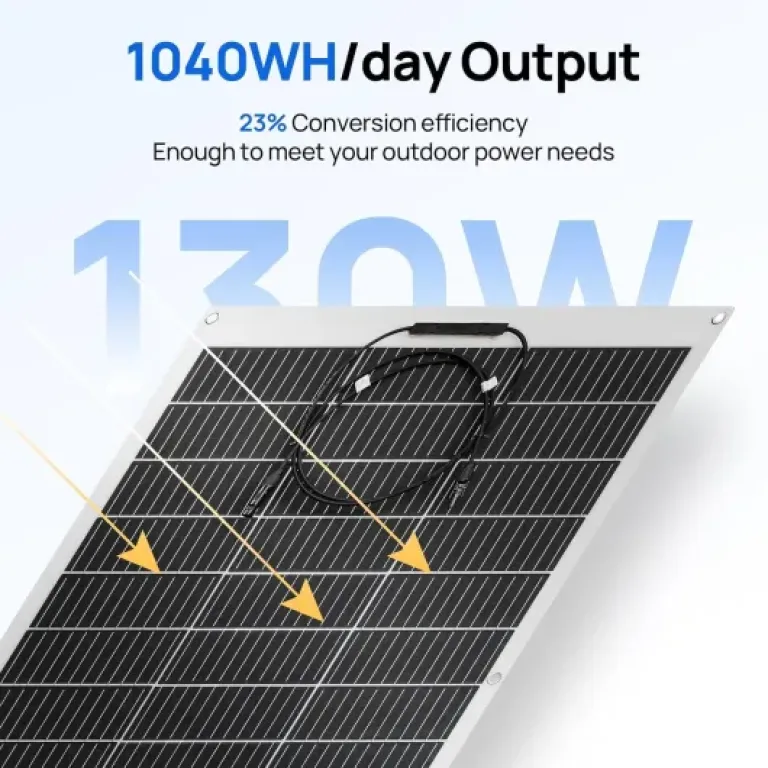
Real-world wattage vs the 260W on the box
Fitting on a camper roof without drilling it to death
What you actually get in the box
Pros
- Very light and thin, easy to mount on camper, caravan or boat roofs without heavy brackets
- Delivers roughly 60–70% of rated power in good sun, which is decent for flexible panels
- Multiple mounting options (adhesive, screws through eyelets) and standard MC4 connectors for simple wiring
Cons
- Less durable than rigid glass panels and shouldn’t be walked on or left to flap in the wind
- Documentation is minimal and no controller or mounting hardware is included, so not very beginner‑friendly
Specifications
View full product page →| Brand | ECO-WORTHY |
Flexible panels that actually pull their weight?
I’ve been playing with flexible panels on vans and small cabins for a while, and a lot of them are frankly a bit disappointing: big numbers on paper, not much coming out of the cables. I grabbed this ECO-WORTHY 2×130W kit to see if a cheap-ish flexible setup could actually keep up with a camper’s real needs (lights, USB stuff, a compressor fridge, and the odd laptop charge). I ran it for a few weeks on a camper roof and briefly on a small shed roof, both in mixed UK weather.
The first thing I looked at was: does it even get close to the advertised 260W, and what happens when it’s cloudy or the angle isn’t perfect? Because with flexible panels, you rarely get that picture‑perfect tilt and orientation. I wired the two panels in parallel to a 20A MPPT controller and monitored the wattage at different times of day. In practice, I was getting roughly half to two‑thirds of the rated power in decent sun, which is pretty much in line with what other users are reporting.
Another big point for me was weight and mounting. On a camper or caravan roof, every kilo and every screw hole matters. These are very light, thin (around 2 mm) and the pre‑drilled eyelets plus the flat back make it easy to stick them down with adhesive or tape instead of drilling. I tried one panel fully glued down and one only fixed at the corners to see if there was any weird flex or flapping at speed on the motorway.
Overall, my first impression is that they’re not perfect but definitely usable. They’re not going to behave like a big rigid 260W glass array on a perfect tilt, but for a flexible setup on a van or boat, they deliver decent real‑world power, are easy to handle, and they don’t feel like flimsy toys. The rest of this review goes into how they perform day to day, how the materials look after some use, and whether I think they’re worth the money compared to a standard framed panel.
Is it good value compared to rigid panels?
On the money side, these ECO‑WORTHY flexible panels sit in that mid‑range budget space. You can usually find a pair of 130W flex panels like this for less than a high‑end marine‑grade brand, but still more per watt than rigid glass panels. That’s normal: you basically pay a premium for low weight and flexibility. If you compare pure cost per watt, a couple of standard 120–150W framed panels will probably be cheaper and likely last longer. But they’re heavier, bulkier, and harder to mount on curved or weight‑sensitive roofs.
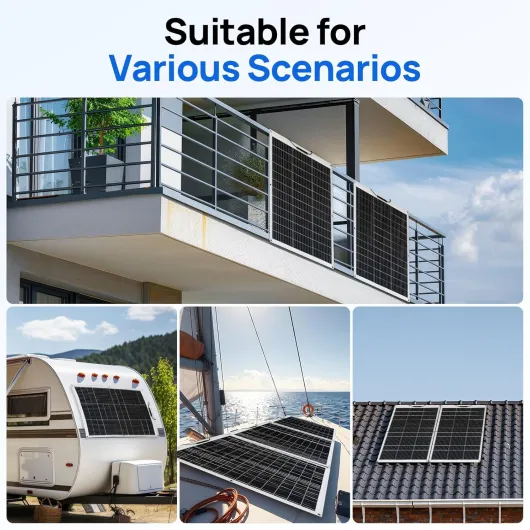
Where this kit starts to look like decent value is on vans, caravans, and boats where drilling lots of holes or adding extra weight is a pain. Being able to stick 260W of panels on a roof without big brackets or rails is worth something. In my case, I was able to mount both panels without adding noticeable weight to the van and without raising the roof profile much, which is nice if you still want to fit under car park height limits.
In terms of real‑world output, you’re effectively getting maybe 150–190W typical peak, which I’d say is enough to comfortably keep a leisure battery topped up, run lights, charge devices, and support a fridge in good weather. For that use case, the price versus benefit feels fair. If you expect them to replace a full hook‑up on bad weather days or run heavy tools, you’ll be disappointed, but that’s not really what they’re for anyway.
So, value wise: if your roof can take rigid panels and you don’t care about weight or height, you can probably put together a slightly stronger system for similar or even less money with glass modules. If, like many camper and boat owners, you need something light, low‑profile, and easy to stick down, this ECO‑WORTHY set is a pretty solid compromise. Not dirt cheap, not top‑shelf, but it gets the job done for a reasonable price.

Thin, bendy and easy to mount (with a few caveats)
Design‑wise, these panels are very much focused on being lightweight and flexible rather than bulletproof. Each panel is around 2 mm thick and feels like a stiff plastic sheet with cells laminated inside. You can bend it over a gentle curve (think camper roof or boat deck), but I wouldn’t try wrapping it over sharp edges. The manufacturer doesn’t give an exact bend radius, but I kept it to very soft curves and had no cracking or weird noises when flexing into place.
There are four metal‑reinforced eyelets (one at each corner). I used them with stainless screws and large washers on a wooden test frame first, and later combined them with adhesive tape on the van roof. The eyelets are handy, but you can tell they’re still the weak points if someone overtightens or if the panel flaps in the wind. On the motorway, with the panel only held by the corners, I noticed slight lifting at the edges, so I’d strongly recommend either full‑surface adhesive or additional fixing points along the sides if you plan to drive at speed.
The front surface is a kind of textured plastic (ETFE‑style) rather than glossy glass. That’s good for weight and flexibility, and it seems to handle light scuffs without instantly looking ruined. I dragged one panel gently over a roof with some dust and small grit; it picked up a few superficial marks but nothing deep. Still, I wouldn’t walk on these regularly, especially not with shoes. They’re clearly not made as walkable deck panels, more like semi‑permanent roof skins.
One thing to note: the junction box sticks up a bit from the surface, and it’s on the front side. If you’re tight on clearance under a roof rack bar or something similar, that bump could be annoying. Also, cable exit direction is fixed, so you have to plan your layout around where those cables want to go. Overall, the design is practical and focused on easy mounting on non‑flat surfaces, but it’s not indestructible. Treat them as lightweight panels that need a bit of care, not as heavy‑duty industrial modules.
Build quality and how tough they actually feel
Durability is the part that always worries me with flexible panels. They’re thinner, they heat up more, and they usually don’t last as long as rigid glass modules. With this ECO‑WORTHY set, I’ve only had a few weeks of regular use so I can’t talk about multi‑year lifespan, but I can at least comment on build quality and how they held up to some realistic abuse: motorway driving, some rain, and a bit of rough handling during installation and repositioning.
The laminate seems reasonably solid. I bent each panel gently several times over a curved surface to test for cracking noises or visible stress; nothing showed up. After some time in direct sun, the surface got hot to the touch, but not so hot that it felt like it was about to deform. No warping or bubbling so far. The edges are cleanly sealed and I didn’t see any delamination starting, which is a good sign. That said, flexible panels in general have a shorter track record than glass ones, so I’d still keep an eye on the edges over the first year.
The waterproofing looks decent. We had a couple of proper downpours; the junction boxes stayed dry inside (I opened one after the rain to check) and the MC4 connections didn’t show any sign of moisture ingress. Obviously you still need to protect any roof cable entry points yourself; the panel itself is only one part of the waterproofing story. The back surface is also sealed, so there’s no exposed backing paper or anything that feels like it’ll peel easily.
My main concern is mechanical stress over time. If you mount them on a roof that flexes a lot or only fix them at a few points, they’ll flap and bend repeatedly with wind, which is what kills flexible panels. I’d strongly recommend either gluing them down over most of the surface or mounting them on a thin backing board (plywood or similar) if you want extra stiffness. If you treat them as light panels that need support and don’t walk on them, I think they’ll hold up reasonably well. If you expect them to survive constant footsteps and heavy objects, you’ll probably be disappointed.
Real-world wattage vs the 260W on the box
Performance is where I was most curious, because flexible panels have a reputation for looking good on paper and then underperforming. I tested these ECO‑WORTHY panels mainly in the UK, late spring, with mixed clouds and some decent sunny spells. I ran them into an MPPT controller feeding a 12V battery bank and watched the wattage over several days. In full, direct sun around midday, with the panels flat on the van roof, I was seeing between 160W and 190W peak for the pair, which is roughly 60–70% of the 260W rating. That lines up with one of the Amazon reviews saying they get about two‑thirds of max power.
When it was bright but slightly hazy, output dropped to around 80–120W. On proper overcast days, I was seeing 20–50W. So they don’t magically produce huge power in bad weather, but they do at least keep trickling in charge. For a camper parked up with a fridge running, that trickle helps keep the battery from dropping too fast, especially if you’re not using loads of power all day. I’d say for a typical camper setup with a 100–150Ah leisure battery and a compressor fridge, these two panels are enough to stay roughly energy‑neutral in summer, as long as you’re not hammering a big inverter.
Shading is the usual solar killer. With a roof vent or a roof rack bar casting a shadow over one strip of cells, output dropped noticeably, though not to zero thanks to the bypass diodes. I did a quick test by covering about a quarter of one panel with a towel; the pair went from about 150W down to around 90–100W. So yeah, you really want to keep them as unobstructed as possible, especially avoiding long narrow shadows that cut across cell strings.
Overall, in practice they deliver decent but not full rated power, which is normal for almost any panel outside a lab. If you size your system assuming maybe 150–180W typical peak instead of the full 260W, you’ll be in the right ballpark. For a van, caravan, or small cabin where space and weight matter, the performance is pretty solid, but if you can fit rigid glass panels instead, those usually squeeze out a bit more power per euro and handle heat and abuse better.
Fitting on a camper roof without drilling it to death
Installing these on a camper roof was mostly straightforward, and that’s one of the main reasons to go flexible in the first place. At around 2 mm thick and very light, you can easily test different positions before committing. I started by placing both panels loosely on the roof, running the cables to where my cable gland is, and checking that nothing hit the roof vents or antenna. Once I was happy with the layout, I used a mix of adhesive and mechanical fixing.
The four metal eyelets on each panel are handy but not enough on their own for a vehicle that’ll see motorway speeds. On my first test drive, with panels only screwed down at the corners, I noticed the middle edges lifting slightly at 60–70 mph. It didn’t rip off, but it was enough to convince me to take them back down and redo it properly. On the second attempt I used a continuous bead of polyurethane adhesive under most of the panel plus the corner eyelets with stainless screws. That made a big difference: no flapping, no lifting, and the panel sits flush with the roof.
For someone who doesn’t want to drill at all, you can probably get away with good quality double‑sided tape or adhesive alone, as the brand suggests, especially on a caravan or static roof. Just make sure the surface is cleaned thoroughly (isopropyl alcohol helps) and that you press the whole panel down evenly. Cable routing is simple thanks to the MC4 plugs, but you still need a proper roof gland and decent cable to reach your charge controller. None of that is included, so plan a small extra budget for mounting hardware and sealant.
On a non‑vehicle surface, like a small cabin or shed, installation is even easier. I tried one panel screwed to a thin plywood backing, then that board screwed to the shed roof. It looked cleaner and also protected the panel from flexing too much. Overall, I’d say installation is easy if you already know the basics, but the included documentation is too light for a total beginner. If you’re new to solar, you’ll need to do some homework on wiring, fusing, and waterproofing to avoid mistakes.

What you actually get in the box
Out of the box, it’s pretty straightforward: you get two 130W flexible solar panels, each with MC4 connectors and about 90 cm (2.9 ft) of cable attached. No charge controller, no mounting kit, no fancy extras. So you do need at least a basic MPPT or PWM controller and your own cables and fuses to make this useful. The panels are about 96 × 69 cm each and only a few millimetres thick, so they’re easy to move around and test in different spots before committing to a permanent install.
The factory wiring is simple: each panel has a small junction box on the front side near one edge, already sealed. Inside are bypass diodes (according to the specs), which helps a bit when part of the panel is shaded, though you still lose a chunk of power if a big section is in the dark. The MC4 connectors are standard, nothing fancy, but they clicked together cleanly and didn’t feel loose. I used my own MC4 branch connectors to run them in parallel to the controller without any issue.
The paperwork is minimal: a very short leaflet with basic specs (260W max for the pair, 12V system, monocrystalline cells, efficiency range around 15–22%), and a quick diagram of how to hook them to a controller. No deep installation guide, no detailed warranty card in my box. If you’ve never wired solar before, you’ll probably end up on YouTube or reading forum posts, because the included instructions are pretty bare‑bones. For me it was fine, but I wouldn’t call it beginner‑friendly from a documentation point of view.
In terms of first impression, the product matches the listing: two flexible monocrystalline panels, light, fairly compact, clearly aimed at motorhomes, caravans, boats, and other curved or awkward roofs. There are no nasty surprises, but also no hidden extras. It’s basically a bare solar kit: good if you already know what you’re doing and have the rest of the gear, less ideal if you were hoping for a full plug‑and‑play package.
Pros
- Very light and thin, easy to mount on camper, caravan or boat roofs without heavy brackets
- Delivers roughly 60–70% of rated power in good sun, which is decent for flexible panels
- Multiple mounting options (adhesive, screws through eyelets) and standard MC4 connectors for simple wiring
Cons
- Less durable than rigid glass panels and shouldn’t be walked on or left to flap in the wind
- Documentation is minimal and no controller or mounting hardware is included, so not very beginner‑friendly
Conclusion
Editor's rating
After a few weeks of use on a camper and a small shed, I’d sum up the ECO‑WORTHY 2×130W flexible solar panels as lightweight, practical, and decent performers, with the usual trade‑offs of flexible tech. They don’t hit the full 260W in real conditions, but seeing 160–190W in good sun is realistic, and that’s enough to keep a typical leisure battery happy, especially if you’re mostly using 12V gear and a modest fridge. Installation is easy if you already know your way around solar: they’re thin, bend nicely over gentle curves, and can be glued or screwed without messing up your roof too much.
They’re not bulletproof. You shouldn’t walk on them, and you should mount them properly so they don’t flap or bend constantly, or they’ll probably age faster. Documentation is basic, and you’ll need to supply your own controller, cables, and sealant. But for vans, caravans, and boats where weight and height really matter, they offer good value and practical performance. If your roof can take rigid glass panels and you want maximum durability and output per euro, I’d still lean toward framed modules. If you need something light, low‑profile, and reasonably priced that just quietly keeps your battery topped up, these ECO‑WORTHY panels are a solid option.