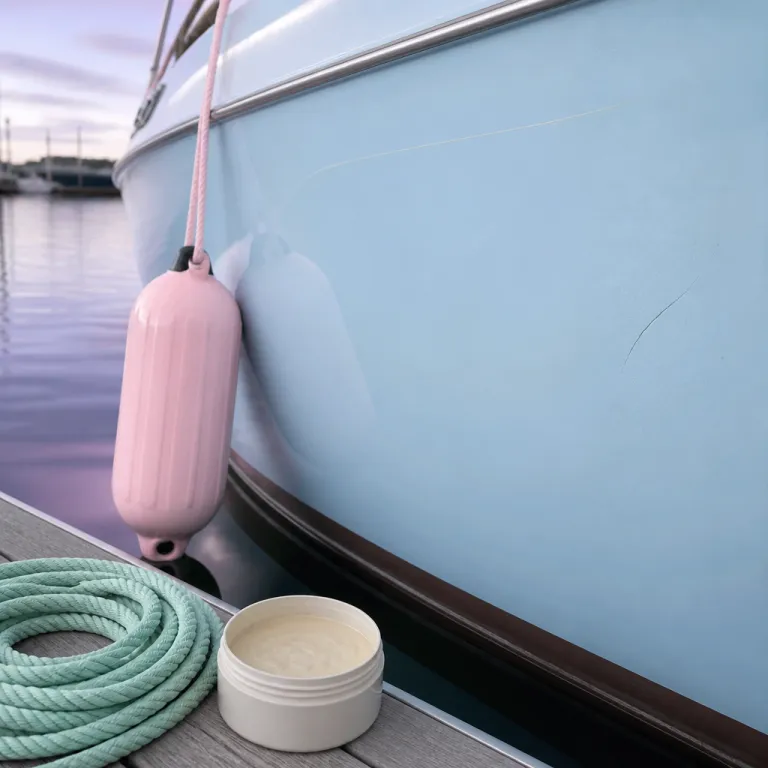
Reading your hull after a Mediterranean season
By the time your boat returns from a long Mediterranean season, the gelcoat is telling a story in scratches, stains and hairline fractures. That story will decide which gelcoat repair jobs belong in autumn and which can safely wait until the spring refit, especially if you want the yacht gelcoat repair guide autumn approach to feel methodical rather than reactive. Walk the dock in Porto Cervo or Port Vauban and you will see owners doing exactly this, studying every small area of the hull before the travel lift slings arrive.
Begin with a slow inspection of the entire boat hull, working from the boot stripe down and then along the topsides where fenders have chafed the surface. Use raking light from a torch or late afternoon sun to highlight cosmetic damage in the gel coat, because shallow scuffs in the gelcoat fiberglass skin look very different from deeper fractures that hint at structural problems in the laminate beneath. A disciplined yacht gelcoat repair guide autumn routine always separates superficial cosmetic damage from impact zones where the fiberglass boat may have flexed hard under load.
Stress cracks radiating from cleats, fairleads or stanchion bases on many boats usually follow a star pattern, while broader crazing in the gelcoat often forms a more random map of fine lines. The first pattern can indicate that the underlying fiberglass and epoxy polyester laminate has been overloaded, whereas the second is often just age and UV fatigue in the original boat gelcoat layer. When owners learn to read these patterns, the yacht gelcoat repair guide autumn checklist becomes a powerful tool rather than a chore before winter storage.
Stress cracks, cosmetic crazing and the cracks that cannot wait
Not every crack in gelcoat means the boat is in trouble, but some absolutely will demand immediate repair before winter. Around deck fittings, a tight cluster of star shaped fractures in the gel coat often signals that the local fiberglass has compressed or delaminated, and that kind of damaged area should move straight to the top of your autumn gelcoat repairs list. Leave it until spring and water will creep through the surface, freeze in colder yards and quietly expand the problem beneath the paintwork.
By contrast, long wandering lines of crazing on wide deck areas or cockpit coamings usually point to cosmetic damage only, especially when tapping the surface with a plastic hammer produces a clean, solid sound. These can often wait until a larger refit, because the structural fiberglass boat laminate below is typically intact even if the color has chalked and the surface looks tired. A pragmatic yacht gelcoat repair guide autumn strategy treats these as aesthetic projects, not emergencies, provided there is no sign of moisture ingress or soft spots underfoot.
Below the waterline, any blistering along the hull deserves more respect, because each blister is a tiny repair area where water has already reached the laminate. If you see clusters of blisters forming near the keel or along the boat hull turn, schedule a surveyor and plan for more than a simple gelcoat repair, since epoxy polyester barrier work may be required. This is also the moment to think about winter storage and proper boat covers for storage, because good protection reduces new moisture problems while the yacht is laid up.
Surface preparation: where long lasting repairs are actually won
Once you have decided which cracks and chips to tackle now, the next step in any serious yacht gelcoat repair guide autumn plan is surface prep. Owners often focus on the repair kit or the brand of gelcoat, yet the quiet work with solvent, tape and grit sandpaper is what really determines whether the repaired area still looks perfect five seasons from now. On a fiberglass boat, shortcuts at this stage almost always reappear later as halos, pinholes or mismatched gloss around the repair area.
Start by washing the hull with a dedicated boat cleaning product, then rinse thoroughly so no residue remains on the surface. After drying, wipe the small area around each damaged area with a wax and grease remover, because invisible silicone from old polish will sabotage adhesion even when the gelcoat works well in test patches. Many owners now add a moisture check with a Tramex meter in suspect zones, especially below the waterline, since trapped water in the laminate will push back against any polyester resin or epoxy polyester filler you apply.
When the readings are stable and low, mask the repair area and feather the edges of the old boat gelcoat with progressively finer grit sandpaper, keeping the sanding shallow for cosmetic damage but deeper where gelcoat fiberglass has fractured. This feathering creates a smooth transition so the new gel coat can be polished flush without a visible ridge once you later polish the repaired surface. Before mixing any product, vacuum the dust, wipe again with solvent and let the surface dry completely, because cleaning repairing steps done patiently now are the cheapest insurance you will ever buy for long term hull protection.
Choosing between polyester gelcoat, epoxy fillers and application methods
With the surface ready, the question becomes which material will best serve each specific repair, and this is where a thoughtful yacht gelcoat repair guide autumn approach separates experienced owners from hurried yard work. For pure cosmetic damage above the waterline, a color matched polyester resin based gelcoat repair kit usually works well, especially on production boats from yards like Beneteau, Azimut or Sunseeker where original color codes are often available. In these cases, the thin outer gel coat layer is mainly about UV protection and gloss, so a carefully applied cosmetic patch can restore both function and appearance.
When the crack hints at deeper stress in the fiberglass, or when you are dealing with compression marks around a cleat or fairlead, an epoxy filler under the final gelcoat repairs is often the wiser choice. Epoxy bonds more aggressively to the existing fiberglass boat laminate and resists future movement, while the finishing boat gelcoat on top restores the original color and surface. This epoxy polyester combination is especially valuable on older boats that have seen hard sailing, because it adds a discreet structural upgrade beneath what looks like a simple gelcoat repair.
Application method matters as much as chemistry, and owners should be honest about their own skills before they start mixing products. Brushed gel coat works well for small chips and a limited repair area, while spray application gives a more uniform surface on larger panels but demands better masking, ventilation and equipment. For those who like to study techniques visually, a well produced video from a reputable yard can be a useful complement to written instructions, though nothing replaces careful testing on a sacrificial area before committing to the visible topsides.
Timing, winter protection and knowing when to call a surveyor
Autumn in the Mediterranean offers a narrow but valuable window for gelcoat works, with sea temperatures still mild and yard schedules less frantic than peak summer. Aim to complete any critical gelcoat fiberglass repairs in September or October, when daytime temperatures and humidity sit comfortably within the ranges specified on your repair kit, because cold, damp air will slow curing and trap water in the laminate. Once the last repaired area has fully cured and you polish the repaired surface to match the surrounding hull, the yacht is ready for haul out and winter storage.
Proper protection over winter is not just about keeping the decks clean ; it is about preventing new water ingress into every repaired area and every untouched crack you have chosen to monitor rather than fix. A well fitted full size cover, such as the type used on V hull runabouts with towers, can dramatically reduce UV exposure and standing water on the surface, especially when you choose a proven waterproof boat cover rather than a loose tarpaulin. Combine that with good ventilation below decks and you cut the risk of hidden moisture creeping into the boat hull while she sleeps ashore.
There are, however, clear moments when an owner should put down the polish and call a surveyor instead of continuing with DIY cleaning repairing efforts. Extensive star cracking around chainplates, deep impact marks at the bow, or widespread blistering along the waterline are all signs that the problem may extend far beyond the visible gel coat and into the structural fiberglass. When in doubt, a professional opinion now costs far less than a structural failure later, and it lets you return to the satisfying, almost meditative work of seasonal maintenance knowing that the big questions have been answered and that your next season of sailing will be defined not by the length overall, but by the wake she leaves.
FAQ
Which gelcoat cracks should I repair immediately before winter?
Prioritise star shaped cracks around deck fittings, deep chips that expose fiberglass and any blistering near the waterline. These areas allow water to reach the laminate, where freeze thaw cycles over winter can enlarge the damaged area and compromise the hull. Superficial crazing on wide deck surfaces can usually wait until a planned refit, provided there is no softness or moisture beneath the surface.
Can I use the same repair kit for all gelcoat repairs on my yacht?
Most off the shelf gelcoat repair kits are designed for small cosmetic damage above the waterline, where a thin layer of polyester resin based gel coat is sufficient. Structural issues, such as stress cracks around cleats or impacts on the bow, often require an epoxy filler beneath the final gelcoat layer to restore strength. Matching the product to the type of problem is essential if you want the repair area to last more than a single season.
How important is surface preparation for long lasting gelcoat repairs?
Surface prep is the single most important factor in whether gelcoat works as intended over time. Thorough cleaning, removal of wax residue, careful sanding with appropriate grit sandpaper and complete drying before application all determine how well the new material bonds to the existing boat gelcoat. Skipping these steps often leads to poor adhesion, visible edges around the repaired area and early failure of the repair.
Is autumn really the best time for gelcoat work in the Mediterranean?
Autumn offers stable temperatures and moderate humidity, which suit both polyester and epoxy polyester products used in gelcoat repairs. Working in this window lets owners seal cracks and chips before winter storage, reducing the risk of water ingress and freeze damage in the laminate. It also means the yacht is cosmetically and structurally ready when the next sailing season starts, rather than losing early weeks to yard time.
When should I call a surveyor instead of repairing gelcoat myself?
Call a surveyor when you see extensive star cracking around structural fittings, large impact zones, or widespread blistering along the hull. These patterns suggest that the problem may extend beyond the gel coat into the structural fiberglass, where professional assessment and moisture testing are essential. A surveyor can also advise whether localised repair is sufficient or whether a broader laminate or barrier coat project is required.